An Employment Equity Report is available, on condition that personal details of the employees, as required by the system, are completed in full.
To print the report (after completion of all required information), follow the steps below:
1. Click on the Main Screen on: Personnel:
2. Select from the options in the yellow block: Printouts.
3. Select from the options on the right hand side in pink/blue: Employment Equity Report:
4. Indicate the required data rage (dates).
5. Select the correct company (if more than one):
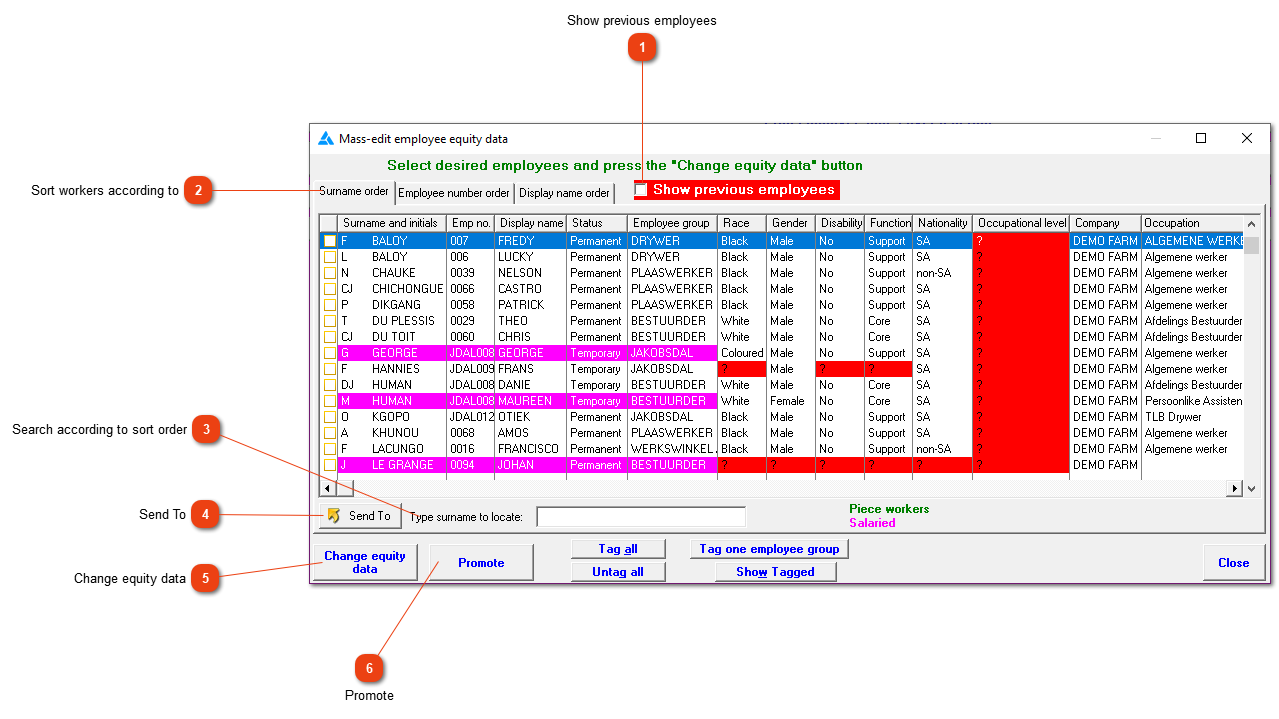
6. A personnel list where mass edit of employee equity data can be done, will open on the following screen. All outstanding information will be highlighted in RED.
7. An example of incomplete information that needs to be corrected is: The race of a number of workers is not completed and needs to be changed simultaneously to the same value. To do this, tick the white block on the left hand side of the employees' names. The 'tick' made will be displayed in green:
8. Select from the options at the bottom of the white screen: Change Equity Data:
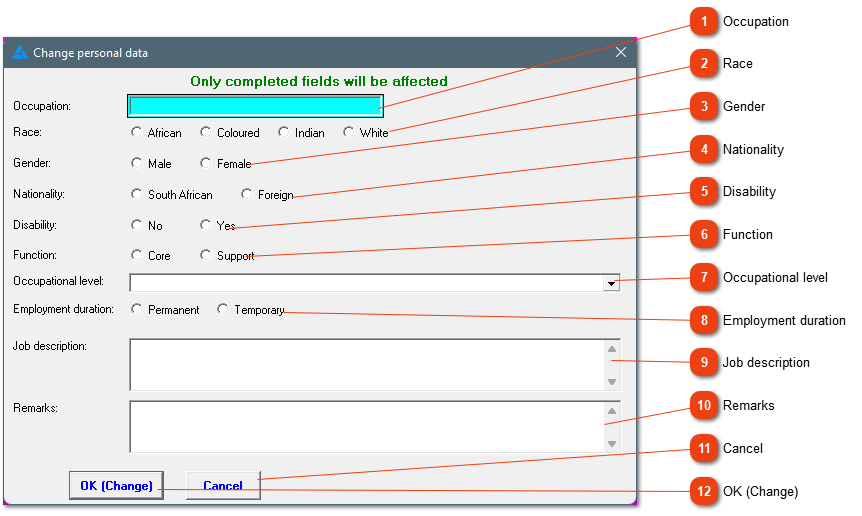
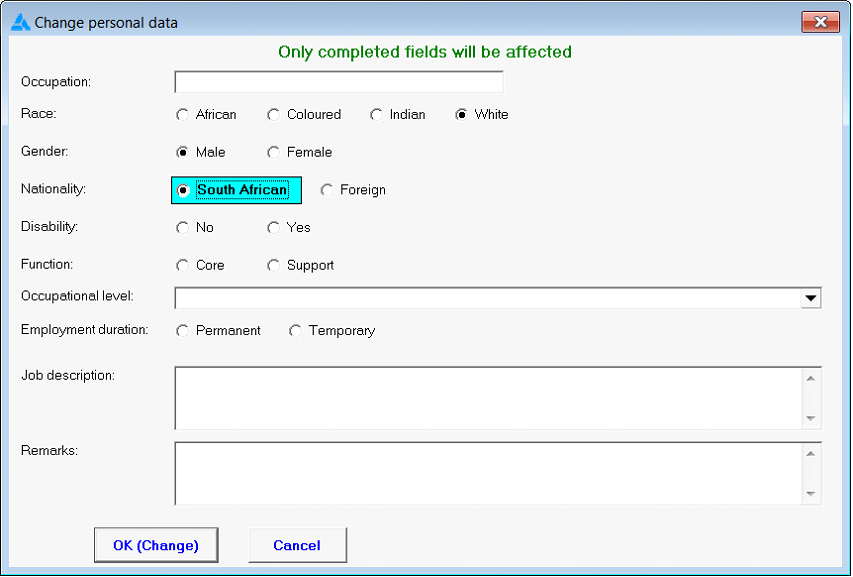
9. A screen will be displayed where personal data can be changed:
Only add information in the fields you want to change.

Occupation

Change all the tagged employees' occupation.

Race

Change all the tagged employees' race.

Gender

Change all the tagged employees' gender.

Nationality

Change all the tagged employees' nationality.

Disability

Is the tagged employees disabled?

Function

Change the function of all the tagged employees. 'Core' means the business cannot function without these employees, i.e. where a business is labor driven, all the laborers have a core function.

Occupational level
Change all the tagged employees' occupational level.

Employment duration

Change all the tagged employees' employment duration.

Job description
Change all the tagged employees' job description.

Remarks
Change all the employees' remarks.


Close the screen without changing anything.


Click here to change the data as indicated.
10. Click on: OK (Change). Only completed fields will be changed. Uncompleted fields will not be taken into account at all:
11. The changes as indicated above, will be reflected on the personnel list (after changes, the personnel list will be displayed again).
12. Repeat the steps above in order to update all outstanding information (highlighted in RED).
13. After correction of all fields, the Personnel List will be displayed in WHITE ONLY. Close the screen, by clicking on: Close.
14. The Employment Equity Report can now be printed by following steps 1 to 5 listed above.
Explanation of options when changing equity data:
|
Check this block to view employees whose services have been terminated. All employees that was in your service for the applicable period will be included on the reports.
|
|
|
Show the employees in surname, employee number or display name order. Choose the applicable option by clicking on the correct tab.
|
|
 Search according to sort order
Search for employees according to surname, employee number or display name. Start to type in the the employee's information according to the sort order. The first part can be added and then use 'tab'.
|
|
|
This button (which becomes active as soon as the list contains one or more entries) allows you to print, export or e-mail the contents of the list.
|
|
|
This will open the screen as explained in number 9 above.
|
|
|
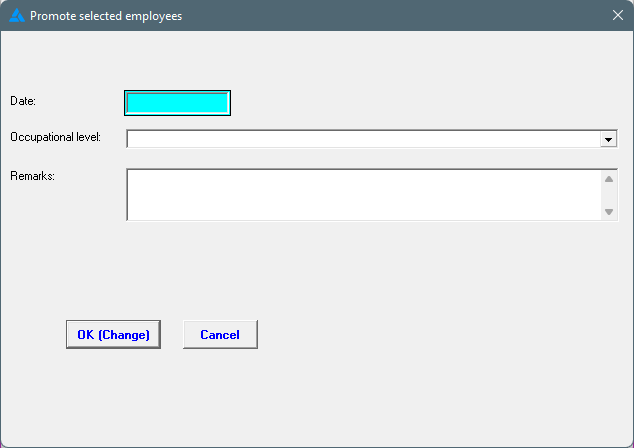
Promote a group of employees. All the employees tagged will be promoted to the same occupational level. Another screen will open, add a date and the new occupational level.
|
|
After changing the data for a group, and you want to continue with the next group, you can remove all of the tags by clicking on this button.
Choose this option if the change is applicable on ALL employees.
This will show you all the tagged employees and remove the employees not tagged from the list.
If a change is applicable on the entire group, they can be tagged here.
Close the window without changing any records.