TODO: To change the footer's content go to Dr.Explain menu Options : Project Settings : HTML (CHM) Export : Setup HTML Template and Layout
Add a new employee
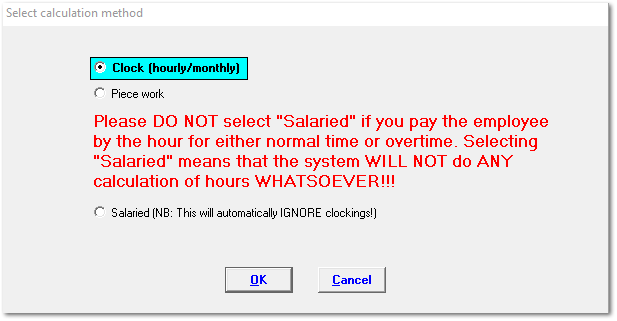
Choose the calculation method/type of worker when you want to load a new employee:
Clock worker: The system uses physical time worked to calculate the employee's wage by means of clock movements or hand records.
Piece worker: The system uses piece work activities to calculate the employee's wage.
Salaried workers: The system generates pay slips at a fixed monthly amount. The wage will decrease when you physically enter unpaid leave or short time on the system.
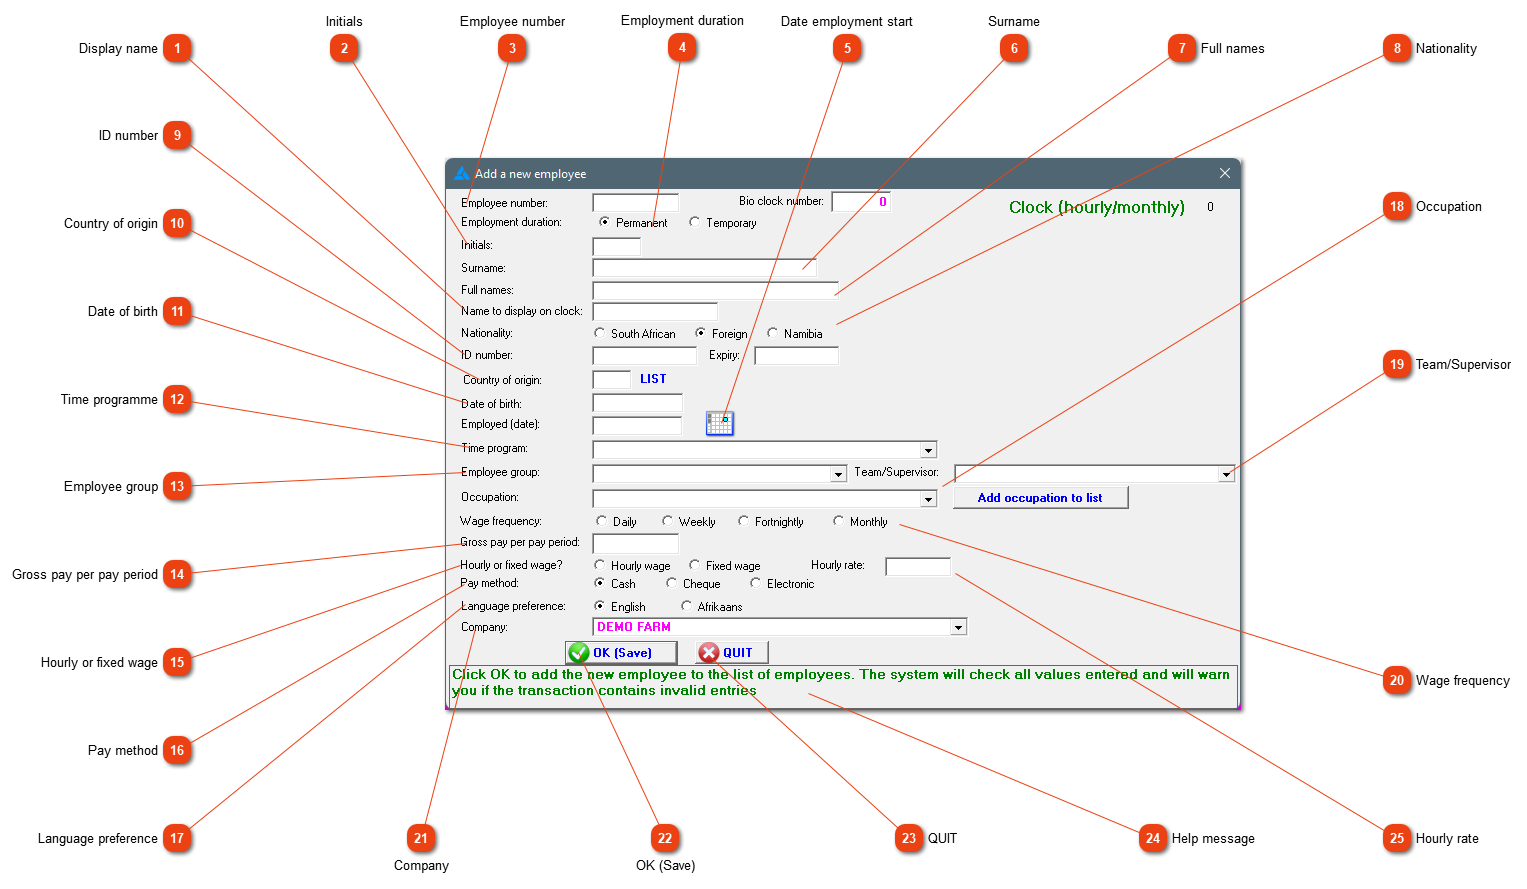
This is where you enter a new employee's details. Please do so carefully and accurately. Although you can rectify mistakes afterwards, it will make your life much easier if you take your time and get everything correct from the beginning.
Display name
This name will be displayed on standalone clocks with display units. If the field is left blank, the clocks will show the employee's first initial and surname. You can use a nickname here if desired, as this name is not used anywhere else.
Enter the employee number here. It can be alphabetic, numeric or a combination of the two. If you prefer to use numeric values only, prefix them with leading zeroes (e.g. 0010 or 0300) to ensure a meaningful sorting order on printouts and onscreen lists.
Type the employee's surname here. The system requires the combination of surname and initials to be unique. If you have two J Smiths in your employ, you can ensure uniqueness by adding nicknames after their surnames e.g. Smith (Johnno), Smith (Jake).
Enter the employee's gross pay for the 'Wage frequency' you have selected (i.e. his/her gross pay per day, week, fortnight, month etc). This is for use on pay slips.
Job title, e.g. 'General worker' or 'Tractor driver' or 'Foreman'.
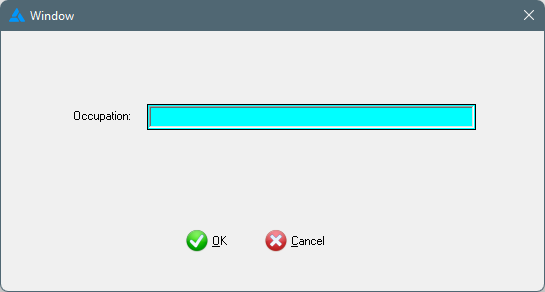
The system does not have a pre-generated list of occupations available. You have to generate your own list. To add an occupation, choose 'Add occupation to list'.
Type the appropriate job title in the field, and choose 'OK'. The occupation will now be available in the list. This isn't necessary information to complete the employee's profile.