TODO: To change the footer's content go to Dr.Explain menu Options : Project Settings : HTML (CHM) Export : Setup HTML Template and Layout
Pay slip template - clock worker
The heading is automatically written as 'Period ending end date':
or 'Month year': .
The heading can be changed to something else if you would prefer to do this, and will be shown after the colon(:). If you do not want to show the pay slip number on the pay slip, it can be removed under Tables / Pay defaults / Print detail on pay slips / More options / Print pay slip number on pay slip.
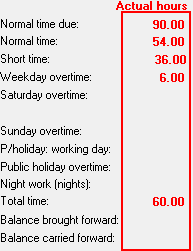
The actual hours worked by the employee will be shown in red. This is NOT shown on the pay slips. This is obtained directly from the attendance report.
Changes between the actual and paid hours can be because of balancing of short time and overtime or the adjustment of hours because of labour law specifications.
1. When the system adjusts hours, the reason for the adjustment can be seen on the 'Print adjusted hours explanation' printout.
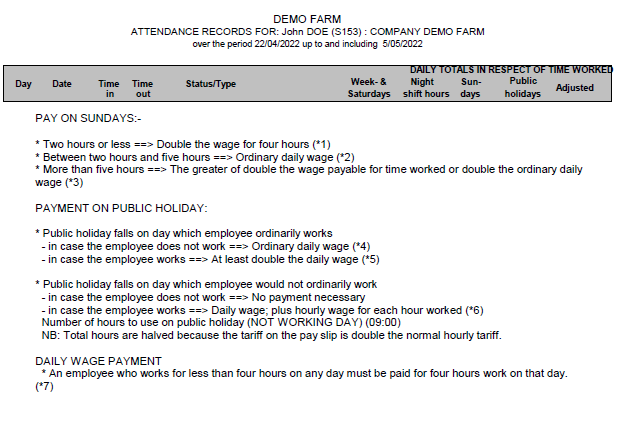
The first page of the report will show the employee's attendance for the applicable period, and if the system did adjust these hours, it will be shown on the right hand side of the report. The explanation for these numbers can be seen on the last page of the report.
The last page of the 'adjusted hours' report: (these rules will differ if the company doesn't fall in the farming sector.
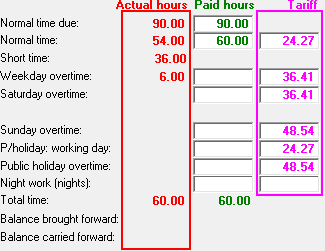
2. The paid hours column can differ from the actual hours, if short time and overtime is balanced. The same pay slip printed above, will look as follows, if short time and overtime has been balanced:
The normal time increased from 54.00 to 60.00 and the employee's overtime was used as normal time. In this case the employee must first fill their normal time before they can start receiving overtime.
Any overtime can be transferred to the employee's savings plan if there is an arrangement between employee and employer. The savings plan can then be paid out with December's leave or as discussed. This is also discussed under 'questions applicable to pay slips'.
If you want to show the employee something specific, and you want it in writing, it can be entered here. The signature field is also close to the remark, so it is a good place to give certain information.
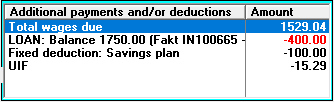
The savings plan is paid out directly on the pay slip, unless the employee received cash before the pay slip was created. The cash option is done with interim savings plan transactions. When the savings plan is paid out on the pay slip, the system will automatically choose the correct pay slip item and the full savings plan amount. The amount can be modified if the employee doesn't want his/her entire savings.
This will then be listed under wage calculation and under savings plan transactions (as a withdrawal) with the current balance.
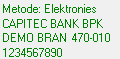
The bank information of the employee will be shown here if it was imported into the system. This will also be printed on the pay slip provided it is set like this and doesn't overlap with other settings.
The pay slip or the tax calculation can be printed for a specific employee. Choose the printout you are looking for, check the correct box and click on OK.
The tax calculation printout is a report with the employee's income, deductions and tax up to this point and it explains why the PAYE is what it is.
The pay slip can be printed at a later stage as well.
If the employee's tariff changes, use the 'Calculate tariffs' option. The system will then adjust all the amounts: overtime, Sunday time, night work, etc. If you only change one field on the pay slip, there will be no other adjustments made.
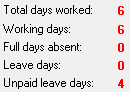
This gives a reflection of what happened in the pay period. How many days did the employee work, how many days was he absent, was the employee on leave, etc.
If the employee wants to sell leave or when the employee's services are terminated, leave can be paid out here. VERY NB: If the employee goes on leave, DO NOT pay out his/her leave. Add leave under his/her name, and create pay slips for the correct periods.
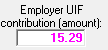
Force the system to recalculate UIF. Sometimes, there is a third decimal that implicates the calculation, and by recalculating it here, the system sorts itself out.
If no UIF should be deducted, this block can be checked. Remember there are legally 3 reasons why one does not deduct UIF. The correct reason can be selected under the employee's personal data.
This is a warning that one of the pay slip items deducts more than the legal maximum. Read more about this by clicking on the 'Maximum exceeded' button.
Discard any changes made. The system will give a warning where it will ask you what must happen to the changes. If it should be discarded, choose 'Discard', otherwise choose 'Retain' and then click on OK (Save).
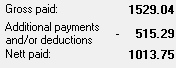
A short summary of the employee's pay slip. The employee's gross salary, with the sum total of additional payments and/or deductions, gives the nett paid that is owed to the employee.



 or 'Month year':
  .
.